milk with a punch

This gallery contains 7 photos.

Last week we enjoyed oatmeal muffins à la Great-aunt Helen’s recipe box and the promise was made to next find an appropriate beverage to accompany.Now to borrow an advertising slogan: Got Milk?Muffins and milk make good partners, but because we’re … Continue reading

boozy baker bourbon brittle cookies

This gallery contains 4 photos.

Imagine this: You find bars of Ghirardelli Dark clearanced out at $2.50 at your local grocer. Do you grab the last bars off the shelf? Does your mind automatically go into must-bake-chocolate-chip-cookie lockdown? If yes to both, we clearly have … Continue reading

cocktail dreams, mojito moments

This gallery contains 7 photos.

Why do we blog? I can’t answer for everyone, but I know I’m here–at least in part–to indulge in fantasy. Though I try to (mostly) write about real life, I read your blogs for vicarious reasons. Thanks to your posts, … Continue reading

2 oatmeal cookies–one traditional, one not so much

A fellow WordPress blogger set a lofty goal for herself in committing to read 52 books in 2014. An avid reader as well, I pledged to join her. While I read a fair amount of food-related fare (culinary mysteries are faves), I enjoy genres of all sorts.

Take my most recent read: Before Green Gables. The prequel to the series of Anne and her adventures on Prince Edward Island, it covers the span from just before her birth to her arrival on PEI. It’s a tale that speaks to the spirit of the underdog as well as how hard life was in earlier centuries.

Though there was no direct food connection, Anne’s story made me crave cookies. Molasses, oatmeal, and other old-school favorites were mentioned in its pages. I wanted a plate of old-school, from-scratch, homemade cookies. Oatmeal seemed the thing and despite a disdain for raisins in baked goods (which I’ve learned many of you wholeheartedly share), I had to have me some oatmeal raisin cookies.

yes, they have raisins, but they're so good!

yes, they have raisins, but they’re tasty!

The recipe came from Susan G. Purdy’s The Family Baker. I followed directions for the extra-chewy version, soaking the raisins in beaten eggs and vanilla for an hour before stirring into the batter. Note that this version replaces 1/2 cup butter with an equal amount of shortening, though coconut oil works if shortening isn’t happening in your kitchen. These are lovely cookies, chewy and sweet. Pair them with a glass of milk and call it breakfast.

And the other oatmeal cookie? This one was found in Bartender’s Black Book, purchased ten or so years ago as my first foray into cocktails. I remember well the winter weekend my husband and I were snowbound with a sick baby. We watched movies to pass the time, but my recently purchased spiral-bound bar guide called to me and I flipped through, imagining the cocktails I could create if only I had the booze.

The following weekend we were still snowbound and baby was still sick. Tired of winter, tired of sick, it was time to make my cocktail dream reality. After making notes of recipes I wanted to try along with spirits to buy, I ventured out the few blocks to a local liquor store and came home with ingredients for an Oatmeal Cookie.

oatmeal cookie squared

an oatmeal cookie served with oatmeal cookies

In the spirit of cocktail evolution, I more recently dressed this drink up after Attempts at Domesticity posted this marvelous concoction on deLizious facebook. A cap of marshmallow fluff and brief spin in the microwave made for a steamy and sweet cookie cocktail. No surprise that it pairs perfectly with treats that Anne (with an “e”) would most certainly have enjoyed.

before heating

before heating

30 seconds later

30 seconds later

what a way to drink!

what a glorious drink!

Extra-Chewy Oatmeal Raisin Cookies

  • 2 large eggs
  • 1 teaspoon vanilla extract
  • 1 cup raisins
  • 1 1/2 cups all-purpose flour
  • 1 teaspoon salt
  • 1/2 teaspoon baking soda
  • 1/2 teaspoon ground cinnamon
  • 1/2 cup unsalted butter, at room temperature
  • 1/2 cup shortening
  • 1 cup granulated sugar
  • 1/2 cup packed brown sugar
  • 3 cups old-fashioned oats

In medium bowl, whisk together eggs and vanilla. Add raisins; stir to coat. Let soak 1 hour.

Heat oven to 350°F. In large bowl, sift together flour, salt, baking soda, and cinnamon.

In mixing bowl, beat together butter, shortening, and granulated and brown sugar until light and fluffy. Add soaked raisin mixture; beat to blend. Slowly beat in flour mixture just until dry ingredients are incorporated. Stir in oats.

Drop batter inches apart onto ungreased baking sheets. Bake 12 to 16 minutes or until lightly browned. Let cool on baking sheets 1 minute; transfer cookies to wire rack to cool completely. Makes 5 dozen cookies.

Oatmeal Cookie Cocktail

  • 2 ounces half-and-half
  • 1 1/2 ounces Irish cream liqueur
  • 1 1/2 ounces butterscotch schnapps
  • 1 ounce Jägermeister
  • 1 ounce cinnamon schnapps
  • Large spoonful marshmallow fluff

In microwave-safe drinking glass or mug, stir together all ingredients except marshmallow fluff. Top with fluff, spooning to seal rim of glass. Microwave, watching carefully, 30 seconds or until warm and fluff is puffed but hasn’t yet overflowed.
more momofuku insanity

I’ll admit to not being on top of the blogging game this week. My posting day arrived, but still no sense of what to write up. While my week was full of the usual food-related projects along with a handful of meals out, nothing had struck me as blog-worthy. And truth be told, sometimes I just get lazy. Having to track details, take pictures, etc for a post can (sometimes, not always) suck fun from a food adventure.

So today’s “inspiration” was forced and also a bit lazy. I grabbed Momofuku Milk Bar, Christina Tosi’s amazing cookbook, from the shelf and flipped through until I found a recipe that looked tasty, used minimal ingredients, and took little time to throw together. And boy howdy, did I strike gold.

Momofuku has been featured here before and for those who haven’t heard of this crazy little New York sweet shop, know that it’s famous for Crack Pie™ as well as crunches, crumbs, cereal milk, brittles, and the like. Tosi has an imagination like no other along with a willingness to think waaaaaaay outside the pastry box. She’s the proverbial kid in a candy store except that she’s in charge of the candy store.

What caught my eye this go-round was her Liquid Cheesecake. A dessert in itself, it’s also an ingredient in ice cream, sorbet, layer cakes (both apple and carrot), and truffles. Tosi is an excellent communicator and only her words will do her thought process justice:

…I’m kind of a fan of the gooey, just-barely-baked approach to making something delicious. There’s just something so naughty and fulfilling about the texture… Once I’d settled into my role as pastry chef at Momofuku, I knew I had every right to eat magically thickened cheesecake filling in the confines of my new home…so began my search for my voice in the form of cheesecake. It was short journey: my heart beats for one and only one kind of cheesecake–the underbaked, messy kind. And so, my signature cheesecake is liquid cheesecake.

Now doesn’t that sound lovely?

Should you share Tosi’s obsession for ooey-gooey goodness, I suggest you find yourself a copy of her book. It’s a fun read and a great kickstart for crazy-good dessert ideas. But if you can’t wait to make liquid cheesecake, here’s what I did:

Heat oven to 300°F. In mixing bowl with paddle attachment, beat 8 ounces softened cream cheese on low speed 2 minutes or until smooth. Scrape down side of bowl with spatula. Add 3/4 cup sugar; beat 1 to 2 minutes or until completely incorporated. Scrape down side of bowl.

In small bowl, whisk together 1 tablespoon cornstarch and 1/2 teaspoon salt; whisk in 2 tablespoons milk. (I used almond milk.) Whisk in 1 large egg. Beat cornstarch slurry into cream cheese mixture on medium-low speed 3 to 4 minutes or until smooth and loose. Scrape down side of bowl. Stir in 2 or so cups chopped chocolate, miniature candy bars, and cut-up marshmallows.batterScrape mixture into 9-inch graham cracker crust. Bake 15 minutes; gently shake pan. Remove from oven if cheesecake is firm in center and jiggly around edge. If mixture is jiggly all over, bake 5 minutes more. Add another 5 minutes if needed, but, in Tosi’s experience, “it shouldn’t take more than 25 minutes to underbake a cheesecake.” Cool cheesecake completely, allowing to set. Store in airtight container in refrigerator up to 1 week.

Note that the candy stir-ins and graham cracker crust were my spins. Tosi bakes in a 6-inch square pan lined with plastic wrap and describes the final “cheesecake” as “pipeable and pliable enough to easily spread or smear, while still having body and volume.”

I’ll close with a warning: This cheesecake is deadly addictive. As expected, it’s creamy and rich, but the chopped candy makes it über-sweet as well. What starts out as one spoonful easily leads to two, then three, etc. And before you know it, you’re regretting those last bites. (or so I’ve been told 😉 ) This is a sweet treat meant to be enjoyed in small portions.

Liquid Cheesecake Pie, not for the feint of heart!

Liquid Cheesecake Pie, not for the faint of heart!

If the description and picture didn’t sell it, I offer one more reason to love liquid cheesecake:

not a fail!

not a fail

so not what I was going for

so not what I was going for

It’s supposed to look like this! I’ve had similar baking experiences that were considered fails (see pink squirrel pie at right) and it seems the same result is a major success here.

Hats off, then, to Christina Tosi for her envelope-pushing sweet treats. I love how she thinks and am ever grateful for her inspirations.

cookbook travels and banana bread squared

A show of hands here–who brings cookbooks home from their travels?

Even with the rise of the electronic recipe (my 11-year-old daughter Googles recipes, despite her mother’s large cookbook collection), paper cookbooks remain popular vacay take-homes. They give travelers return trips, even if just in mind and taste buds.

Opening Makers Mark® The Special Touch cookbook, a Kentucky purchase, I smell the bourbon of distillery tours. When the pages of Savoring San Diego are flipped, I see the ubiquitous flowers of that fair city. The Montana Cookbook brings back a sense of open land and Simply Colorado invites visions of rocky mountains.

While relatively close to home, the city of Duluth was another vacation spot worth remembering. (Culinary details from last summer’s camping trip recorded here.) An especially impressive restaurant stop was The Duluth Grill, and their cookbook told the tale of evolution from Ember’s franchise to one-of-a-kind comfort-food haven. The parking lot garden speaks volumes to their emphasis on fresh, locally sourced, and sustainably raised ingredients.

The book’s $30 price tag gave me pause and I left without, knowing I’d find it online for far less. Except I didn’t. The Duluth Grill Cookbook was available only on the restaurant website. I kicked myself (and certainly deserved a kick for not supporting small business when I had the chance), but found redemption in a friend who was making a quick trip that way. She, too, is a big fan of this much-loved restaurant and agreed to bring the cookbook back for me.

sauce with bookJust last week, then, I finally held a copy of this beautiful and lovely book in my hands. To prove its worth, I immediately set out to make Tofu and Walnut Marinara (taking a pass on the walnuts). It was hearty, flavorful, and packed with good-for-you veggies. Two days later it tasted even better and I know I’ll be making this sauce again.

now THIS is a tofu marinara sauce

now THIS is a tofu marinara

beet lemonade and it was really quite good

beet lemonade and it was really quite good

I have my eye on the Ratatouille recipe as well as the Buffalo Tofu Strips, both dishes I enjoyed while there. I’d also love to make their Beet Lemonade, though will have to riff on their standard Lemonade recipe as they do not share the beet version I was so enamored with during my visit.

Minnesota’s bitter cold winter called for a baking recipe, so I also made TDG’sr Chocolate Chip Cookies. In the same manner as an earlier cookie adventure, I experimented with each baking sheet, sprinkling some unbaked cookies with chocolate salt, some with vanilla salt and also mixing in marshmallow bits and even leftover movie popcorn that was sitting on the counter just asking to be poured into the remaining batter. Even without my improv, these cookies were amazing and hit all the right sweet, salty, tender, crisp notes.

cookies

because one photo of these amazing cookies would not have been enough

because one photo of these amazing cookies would not have been enough

So here’s to cookbooks and here’s to travel and here’s to those cookbook gems we find when we travel. If you’re looking for the recipe for either the sauce or cookies, let me know in comments or at deLizious facebook and I’ll pass them on your way.

And speaking of sharing recipes, I’ve been on a bit of a banana bread binge lately after finding two renegade recipes on favorite food blogs that demanded to be made. The Cottage Grove House rocked my world with Rye Whiskey Banana Bread

there's rye whiskey in my banana bread!

there’s rye whiskey in my banana bread!

and Shanna over at Curls and Carrots kept my spirits up with Rum-a-Dum-Dum Banana Bread. Thanks, ladies, for two fabulous loaves!

rum-spiked banana bread

rum-spiked banana bread

pan of (granola) bars

Pre-kids (and pre-Internet), collecting cookbooks was my thing. Consequently, my shelves are lined with hundreds of books I can’t seem to part with. While I’ve pared the collection down some, I still have far more cookbooks than I’ll ever need or use.

I’m betting many of you can relate. Cookbooks are more than recipes–they remind us of the people who gave them to us, restaurants enjoyed, travels made, classes taken, places lived. Even though there are plenty I’ll never cook from, each has its own reason for sticking around.

Why, though, would I purchase another cookbook? There are few recipes that can’t be found online and decluttering has more appeal than acquiring.

my new toy

my new toy

But I’m easy prey for a good deal and a pretty face. Hamilton Book offered both when its recent flyer advertised Entenmann’s Home Baking for a mere $4.95. Shipping didn’t add much and the memories I have of Entenmann’s baked goods, sitting on supermarket shelves in their blue and white boxes, drew me in. I wanted–no, needed–this book!

So in my collection it now sits and I’ve enjoyed turning its pages. Muffins, cookies, crumb cakes, pies, fancy desserts–they all look wonderfully homespun and there are many I would make. The Almost Homemade chapter uses Entenmann’s products as ingredients (their frosted donuts–along with coarsely chopped popcorn–somehow morphs into Dreamy Chocolate Bars). It all looks like great fun and I’ve already gotten my money’s worth by making two recipes.

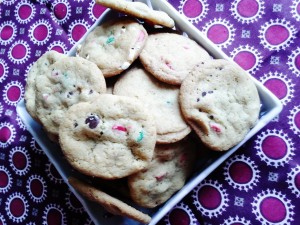
Their basic chocolate chip cookies got a bit of a makeover when I subbed in cut-up Halloween candy (still trying to make my way through our stash) for the chips and are rich and buttery and delish.

Nutty Granola Bars were almost as successful. The photo reminded me of the Nature Valley bars we buy in bulk to keep my husband in constant supply. I’ve tried to make DIY versions with varying levels of success (thanks, Ada, for one of my favorites!), but have yet to achieve the crunch of store-bought brands.Open book

pan of bars

pan of bars

Instead of corn syrup, I used honey (seemed a cleaner ingredient) and maybe that was why these bars were softer than expected. Flour and a longer bake time differentiated this recipes from others, but the bars were still more soft than crisp.

Nutty Granola Bars

Nutty Granola Bars

Ironically, the other issue was that the edges crumbled and I had a cup or so of granola left in the pan after cutting and wrapping. The granola–and bars–were fantastic: buttery, a bit salty (did I mention I sprinkled the bars with Maldon sea salt before baking?), just slightly sweet. A splash of almond milk added to the granola crumbles made a fine supper.

granola for supper

granola for supper

I’m glad to have tried this recipe, but would add a bit more honey next time in hopes of better gluing the dry ingredients together. Perhaps a slightly longer bake time, higher temp, and larger pan would crisp them up a bit. Most likely, I’ll find another granola bar recipe to try (if you have one you love, please holler in comments or message me via my deLiz facebook page). Entenmann’s Home Baking will see more use, though, as there are crumb cakes, et al. to be made. This book will earn its place on my shelf.

Nutty Granola Bars

adapted only slightly from Entenmann’s Home Baking

  • 2 1/3 cups rolled oats
  • 3/4 cup chopped hazelnuts
  • 1/2 cup all-purpose flour
  • 1 teaspoon ground cinnamon
  • 1/2 cup butter
  • 1/2 cup packed light brown sugar
  • 2 tablespoons honey or corn syrup

Heat oven to 350ºF. Grease 9-inch square pan. (original recipe calls for 8×8-inch)

In large bowl, mix oats, hazelnuts, flour, and cinnamon.

In saucepan, combine butter, brown sugar, and honey; cook over medium heat, stirring, until sugar is dissolved. Pour over dry ingredients; mix well. Spoon mixture into pan, pressing down and smoothing top. Bake 25 minutes or until golden and firm to touch. Cut into 16 pieces while still in pan; cool completely. Makes 16 bars.

giving you mo’ crunch

Food for fun is celebrating, folks! This was guest-post week over at Blog of Funny Names and, not only was it a crazy-fun post to write, but it connected me directly to my superstar subject.

My funny-name pick is a food-tv host, but also famous for his work in politics, Hollywood, and journalism. (I won’t name this famous gent here, so I strongly recommend you click over for a read.) When I tweeted him the link to my post, he tweeted back with a thanks, kind words, and share of my link. His simple act put me over the moon and I’m honored and humbled to have someone so public read my homage to him.

To celebrate, I made another round of Momofuku Milk Bar‘s “crunch.” If you’ve not seen their book–and if you’ve made peace with processed sugar–you need to give it a read. It’s drawn me in like that proverbial kid in a candy store. Everything in it is so naughty!

Cereal milks, ice cream made from cereal milks, crack pie™ (yes, they ™ed their crack pie), confetti cookies, candy bar pie, cinnamon bun pie, peanut butter nougat, chocolate malt layer cake, graham ice cream, carrot cake truffles, nut brittles–this list goes on. And then there’s the Crunch chapter. Here’s pastry chef Christina Tosi’s take on The Crunch.

The crunch is all about filtering our snacking spells…making crunchy textural elements all our own. Never too far from the familiar cornflake, pretzel, or cracker, we’ll make crunch out of almost anything the supermarket sells and then use it in something as fancy as a plated dessert or as simple as a cookie dough.

Each crunch recipe has a balance of salt and sugar as well as melted butter–the glue–and milk powder, which seasons and helps bind the mixture once baked. The beauty of the crunch, besides the obvious sugar, butter, and snack-attack allure, it the way it’s baked. Slow and low in the oven yields the most amazing tender caramelization in every crunchy snack-ridden handful, cookie, pie crust, or garnish.

If that doesn’t make you want to whip up a batch of Crunch.Right.Now., there’s no need for you to read further. 😉 But for those still with me, here’s how it went down.

First up was the Ritz cracker version, which I then used in Momofuku’s recipe for cornflake-chocolate-chip-marshmallow cookies, subbing in Ritz Crunch for the cornflake version. These cookies were wicked good. Stopping at just one–something I can usually do–was not an option. Adding Crunch to cookie dough–whether Momofuku’s or another favorite recipe–means you may down at least three or four of these crunch-ified cookies in one sitting. You’ve been warned.

pretty? no. irresistible? absolutely.

pretty? no. irresistible? absolutely.

Today’s celebration batch was all about color: Fruity Pebbles Crunch. (Other options include cinnamon toast, pretzel, and cornflake, though Tosi’s point is good: you could use pretty much anything for the “crunch” ingredient.)

haven't had these on my table since I was 7

haven’t had these on my table since I was 7

To avoid too much of a calorie disaster, I made only a half-batch: 1 1/4 cups fruity pebbles, 1/4 cup nonfat dried milk powder, 1/2 tablespoon sugar, pinch coarse salt, and 3 tablespoons melted butter stirred together, then spread out onto a silicone mat-lined baking pan. Baked 20 minutes at 275ºF, then cooled, it can be sprinkled on ice cream, stirred into batter or dough, mixed with yogurt, or eaten in all its rainbow glory as-is.

spread out before baking

spread out before baking

Next time you want to celebrate (heck, this works when you need to console yourself as well), add “make Crunch” to your to-do list. Sure, do a few crunches afterward if it makes you feel better, but you’ll need to get back to the Milk Bar cookbook eventually as there is more celebrating to do.

fruity pebbles Crunch à la momofuku milk bar

fruity pebbles Crunch à la momofuku milk bar

amazing muffins and crazy ice cream part II

super muffins, DIY ice cream, and salted caramel sauce--it doesn't get any better than this

super muffins, DIY ice cream, and salted caramel sauce–it doesn’t get any better than this

Last week, food for fun featured a muffin recipe that had knocked my socks off. But the post was left only partially complete as there had also been mention of combining the much-loved muffins with vanilla ice cream. What with my fondness for homemade ice cream, this wasn’t a casual statement. I was going to make that ice cream. The tale picks up here…

bake sale goodies

bake sale goodies

A few weekends back, I worked at a culinary garage sale for Les Dames d’Escoffier. Money was raised for Urban Roots, an amazing local inner city youth gardening program, and it was a fun way to spend a Saturday. There were bake sale treats to be enjoyed as well as fun kitchen and garden items looking for new homes.

Though officially working  the sale, I managed to find a good number of items that needed their new home to be mine. One such purchase was Cooking Wizardry for KidsPublished in 1990, this old-school spiral-bound gem offers basic-but-fun recipes and sweet cartoon illustrations. The Make Your Own Favorite Restaurant Food chapter dates the book especially with recipes for exotica such as milkshakes, pizza, chicken nuggets, tacos, burgers, sub sandwiches, and salad bars. (Though the chicken stir-fry was probably quite progressive at the time.)

In that same chapter were two recipes for ice cream. One used only a blender, and I’ll be giving it a whirl eventually. But the other, subtitled “With a Microwave Oven and an Ice Cream Freezer,” intrigued me most. It cooks the custard base (which contains flour of all things) in the microwave, chills it, then churns in an ice cream maker. Turns out the method works well.

This ice cream easily accompanies Super Muffins and would pair well with cake or cookies, too. It would also be lovely topped sundae-style or served solo. However enjoyed, this ice cream wins Best Garage Sale Find Ever.

Make-Your-Own Ice Cream Project (With a Microwave Oven and Ice Cream Freezer)

I’ve topped it here with a recipe from Lilly Sue and her fab Bites and Brews–her chocolate beer sauce is a revelation. Lovely poured over ice cream, it’s also worth drinking by the cupful. This stuff made me swoon.

  • 1/2 cup sugar
  • 1 1/2 teaspoons all-purpose flour
  • 1/8 teaspoon salt
  • 1 cup milk
  • 1 large egg
  • 1 cup heavy cream
  • 2 teaspoons vanilla extract

In 1-quart glass measure, mix sugar, flour, and salt. Stir in 1/4 cup milk until smooth. Stir in remaining 3/4 cup milk. Microwave on HIGH 2 minutes. Stir well. Microwave on HIGH 3 minutes longer; stir. (Mixture should be smooth and slightly thickened.)

In small bowl, beat egg lightly. Pour small amount of hot milk mixture into egg, stirring constantly. Whisk egg mixture into hot milk mixture until smooth. Microwave on HIGH 30 seconds; stir. If mixture is not yet beginning to boil, return to microwave for another 30 seconds. Cover; refrigerate at least one hour, but preferably overnight. (Mixture must be thoroughly chilled before churning.)

Before churning custard, whisk in cream and vanilla. Process according to ice cream freezer manufacture’s instructions. Makes 2 cups.

proving the pudding…is delish

It’s been a double-down week for classes as my daughter and I taught a kids’ cooking class last weekend, then Monday eve I helped same daughter’s Girl Scout troop earn their Simple Meals badge. Originally intending to repeat my Saturday menu (DIY instant oats, noodle bowl, chicken tenders) for the troop, I realized that badge requirements called for a dessert. This realization hit the morning of the Scout meeting, leaving me little time to come up with a quick-and-easy sweet that would teach basic cooking skills and appeal to 10- and 11-year-old taste buds.

Little time was needed, though, as the obvious dessert choice was homemade chocolate pudding. A favorite dessert with my family (especially the husband), pudding needs only a few ingredients, cooks up quickly, and is undeniably swoon-worthy. I also imagined that at least a few of the girls may have only experienced the snack-pack variety of pudding. And I was excited to see these girls learn that homemade is so much better.

The recipe I turned to is from Make the Bread, Buy the Butter, a highly readabale book by Jennifer Reese of Tipsy Baker fame. Though I cut down on the milk just a smidge, I otherwise honored the recipe and its prose, quoting the recipe’s cleverly-written doneness test to the budding cooks: “It will start out looking like scummy hot chocolate, after which it will look like thin hot chocolate, until suddenly it becomes hot, bubbling glossy pudding. This is how you know it’s done.” While wordy, it’s also wonderfully descriptive and perfect for anyone who hasn’t cooked up pudding before.

As suspected, the pudding was a huge hit–sweet, but not overly so and also at a “chocolatey” level ideal for young kids who may not yet appreciate the darker side of chocolate. (Though using dark cocoa powder instead of the traditional would fix that.)

When I posted a photo collage of the foods the girls made that night (quinoa, roasted carrots and asparagus, breaded chicken tenders, and the pudding) on deLizious’ facebook page, all comments were for the pudding. And that’s when I knew I had a blog post.

From-Scratch Chocolate Pudding

tweaked only slightly from Jennifer Reese’s awesome Make the Bread, Buy the Butter

  • 1/2 cup packed brown sugar
  • 1/4 cup unsweetened baking cocoa
  • 3 tablespoons cornstarch
  • 1/8 teaspoon salt
  • 2 cups milk (2 1/4 cups in the original recipe and Reese recommends whole, though I use what we have which is usually 1%)
  • 1 teaspoon vanilla extract

In medium saucepan, stir together brown sugar, cocoa, cornstarch and salt.  Whisk in milk. Cook over medium heat, whisking constantly, until hot, bubbly, and glossy. (The better doneness descriptor is given above.) Remove from heat; whisk in vanilla.

Divide pudding among 4 serving dishes. Cover with plastic wrap. (Or not–I do not as I like the thin layer of skin that forms on a pudding’s surface as it chills. Texture!) Refrigerate. (Or not–who can wait for chocolate pudding to chill? It tastes great warm and slightly thinner, too 🙂 ) Makes 4 servings.

creamy chocolate pud from scratch!

creamy chocolate pud from scratch!

connections and cornbread

Tonight’s recipe is the happy result of a fun virtual connection. A few weeks back I guest-blogged my first post on a favorite WordPress site. I first visited Blog of Funny Names just under a year ago and was quickly hooked. Well-written, smart, and occasionally irreverent, BoFN offers background on random funnily named folk and–sometimes–geographical locations. I welcomed the opportunity to contribute the occasional funny (food) name, and started things off by writing up cookbook author and writing guru Crescent Dragonwagon. My post appeared to go over well enough, but I had no expectation of actually connecting with my subject.

Imagine my surprise when a friend gave me a heads-up that Crescent Dragonwagon–a woman I had come to admire greatly after my online research–had somehow found my BoFN post and shared it on her facebook page. I quickly shot off a note of thanks to Crescent and she graciously responded and even dropped over to my deLizous facebook page. Two of her cookbooks, The Cornbread Gospels and Bean by Bean, now sit on my shelf. Excited to put them to good use, I  brought the cornbread book into the kitchen today. Crescent’s recipe for “Thirded” Colonial Cornbread looked to be exactly what the afternoon called for.

Because Crescent is an established cookbook author and food writer, I guessed that any recipe in her books would be a winner. What I hadn’t counted on, though, was how lovely these books would read. Her intro to the Thirded cornbread taught me that early Colonial Americans made doughs using one-third each rye flour, cornmeal, and whole wheat flour “in order to stretch their thin and dear wheat supplies.” She went on to mention that this particular bread “is can’t-stop-eating-it delicious a few minutes out of the oven, with a little butter. It’s still good that same day, goes quite nicely with vegetable soup or stew, and can be split, toasted, and gussied up with sharp Cheddar cheese melted on each half.” Good information for sure, but it’s also extremely well-crafted prose. I look forward to delving further into Crescent’s books–both for recipes and reading pleasure.

But about that recipe: “Thirded” Colonial Cornbread turns out a lovely pan of hearty and wholesome (and addictive, as Crescent noted) cornbread. The rye was barely noticeable (a plus as my 6- and 10-year-olds would’ve turned their noses up at such a strong flavor) and because whole wheat pastry flour was used, the whole wheat flavor was more of a background note as well. What did come through was a complex earthiness sweetened only slightly (but just enough) by molasses. (Though I subbed in sorghum as I didn’t have the blackstrap called for.) I also added the 1/4 cup sour cream and 1/4 teaspoon baking soda recommended for a moister bread. This cornbread was crumbly, but also firm and it held together well. It seemed the perfect balance of light and dense. I see it working with all of Crescent’s suggestions: a side for soups and stews, a base for bread pudding or French toast, crumbled into stuffing. I’m also excited to top it with honey, yogurt, and berries for tomorrow’s breakfast.

Colonial cornbread

Colonial cornbread

When I started my blog, just over a year ago, my only plan was to write up fun food finds. It’s been gratifying to see posts take shape, but it’s been even more rewarding to connect with other fun folk–foodie and otherwise. I treasure all of these connections and thank all who read foodforfun. Thanks, as well, to Crescent Dragonwagon. What started as a search for a funny name ended with a delightful new connection and a pan of amazing cornbread.

Colonial cornbread--yum!

triple threat cornbread: good-for-you, gorgeous, delicious

“Thirded” Colonial Cornbread

from Crescent Dragonwagon’s The Cornbread Gospels

  • Vegetable oil cooking spray
  • 3/4 cup stone-ground yellow cornmeal
  • 3/4 cup whole-grain rye flour
  • 3/4 cup whole wheat pastry flour
  • 1 tablespoon plus 1 teaspoon baking powder
  • 1/2 teaspoon salt
  • 3 tablespoons butter or mild vegetable oil
  • 3 tablespoons blackstrap molasses
  • 2 large eggs
  • 1 1/4 cups milk, measured into a 4-cup measure
  1. Heat oven to 375°F. Coat an 8×11-inch baking pan with cooking spray.
  2. Sift together the cornmeal, rye flour, whole wheat pastry flour, baking powder, and salt in a medium bowl. Set aside.
  3. Measure the butter or oil by tablespoon into a small skillet or saucepan, then, using the same thus-greased tablespoon, measure in the molasses. Place on low heat to thin the molasses and melt the fat.
  4. Beat the eggs into the milk in its measuring cup, and then stir in the warmed molasses and butter.
  5. Combine the wet and dry ingredients with as few strokes as possible (the batter will be much darker than typical cornbread batter). Transfer it to the prepared pan.
  6. Bake the cornbread until it is firm and deeply brown, with browned edges slightly pulling away from the sides of the pan, about 30 minutes. Makes about 12 squares.

wrapping up deLizious loose ends

This has been a week of some culinary success as I wrapped up loose ends on three projects. Because the projects were started here, with you, I wanted to report back on what went down.

First, the caramel sauce: In an earlier post, I’d learned how to avoid crystallization by covering the pot while the sauce boils down. Because the water is trapped in the pot, the evaporation and browning occur much more slowly than if the pot boiled uncovered. (But if it boiled uncovered, I’d have to wipe down the inside of the pot with a wet pastry brush, and that method rarely ends well for me.) The result of my four (yes, I made caramel sauce four times in a row) trials was light caramel, followed by just a wee bit darker caramel, bit darker yet, then my final batch of still blonde caramel.

four (very blonde) shades of caramel

four (very blonde) shades of caramel

The book I took my recipe from mentioned an ultra-dark, nearly burnt caramel sauce that sounded divine. This is what I wanted. I tried again this week and was thrilled with my final batch of deep, dark, caramelly caramel that was just this side of smoky in flavor. Sea Salt Caramel success could finally be checked off my list. The difference this time? A digital thermometer ensured the recommended end-point of 355°F. With my closed-pot method, this took over half-an-hour to achieve, but so worth it. The sauce was finger- and bowl- and spoon-licking good.

Salted Caramel Sauce (finally) done right

Salted Caramel Sauce (finally) done right

Since there’s finally an amazing caramel sauce in the house, I needed ice cream. After enjoying buttermilk ice cream from Sweet Cream and Sugar Cones (this was quite an adventure–read about it here if you like tales of intrigue, loss, and ultimate triumph), I wanted a shot at the book’s crème fraîche flavor.

First step was making crème fraîche–already a favorite kitchen project of mine. Recipes are easy to find online, but my version whisks together 1 cup heavy cream, 1/4 cup buttermilk, and 1 tablespoon plain yogurt and lets it sit overnight in a warm place before refrigerating for storage. Next, the ice cream: The recipe mirrors the one for the buttermilk version except for losing one egg yolk and replacing the buttermilk and vanilla (stirred in just before churning) with 1 cup crème fraîche and 2 tablespoons strained fresh lemon juice. It’s a tart little number, slightly sour but still sweet. More decadent than the buttermilk, which had a simpler flavor, the crème fraîche was second on my list. That said, it’s a fun flavor and I’d make it again.

homemade crème fraîche ice cream

homemade crème fraîche ice cream

My final wrap-up was the launch of my new deLizious website. Fifteen years ago I started Food Communication Services; last year I decided it needed freshening up. This blog was a part of the re-launch, as was a new name, new logo, and facebook page (all fun food and drink all the time!). The biggest piece of the pie was a new website and I’m thrilled to finally see it live. Many thanks to all followers and readers and commenters and likers. deLizious wouldn’t be as much fun without you! With gratitude, I send you crème fraîche ice cream and caramel sauce wishes:-)

twice as good together

twice as good together

the most expensive ice cream I’ll ever make

With Minnesota’s recent frigid blast of cold weather, I’d bet there’s been lots of baking going on. Baking seems meant for cold days, which was reason enough for me to whip up a loaf of banana bread and multiple batches of chocolate chip cookies (science fair time!). But I’ve also rebelled and made what is most definitely not winter fare.

A library borrow–Sweet Cream and Sugar Cones–was my inspiration. There’s plenty to this lovely book (sugar cones, shortbread, cakes, herb-and-spice ice creams, fruity ice creams, decadent ice creams), but I was drawn to the simpler flavors. Buttermilk ice cream was a must-make as I’m always trying to push through a 50-pound bag of buttermilk powder I couldn’t resist buying a few years back. (I’m a sucker for good deals.)

Despite the 5°F high yesterday, I set about to make my own ice cream. My snazzy little ice cream maker (it’s red!) meant that all I had to do was cook up a custard, cool it down, age it overnight (hardest part as I wanted to churn it immediately), then spin it the next day to freeze.

Thinking it would make a fun blog post, I started snapping photos as the custard just approached a simmer. One hand on the phone, one hand on the whisk–recipe for disaster. As my phone splashed into the hot custard base, my heart sank. Knowing I’d burn my hand if I reached in, I frantically pulled open drawers looking for a pair of tongs to extract the phone. I removed it from its case and wiped it down and was thrilled when it still seemed to work. After only briefly considering tossing the custard (nah), I soldiered on, cooking and then cooling the base for overnight refrigeration.

custard sans cell phone

custard sans cell phone

Trying to receive a phone call later that night, I realized the phone was indeed damaged. Which makes this ice cream a spendy one. Never one to hold a grudge, I churned the ice cream this morning and found it to be every bit as tasty as I’d imagined. Rich, very slightly tangy, sweet, creamy, lush. A drizzle of homemade Hershey’s syrup (as easy a DIY as they come–you must make this and keep it on hand at all times) made it Perfect.

amazing buttermilk ice cream with diy Hershey's syrup

amazing buttermilk ice cream with diy chocolate syrup

Subzero temps and having to shell out a chunk of cash to replace my phone–two downers for sure. But there’s no changing the weather and what’s done is done, so I’ll enjoy my buttermilk ice cream and keep paging through Sweet Cream for the next batch of ice cream inspiration. Crème fraîche (on page 38) is looking pretty good….

Buttermilk Ice Cream

adapted slightly from Sweet Cream and Sugar Cones

  • 3 large egg yolks (original recipe was for 5)
  • 3/4 cup sugar
  • 1 1/2 cups heavy cream
  • 1/2 cup 1% or 2% milk (used 1%)
  • 1 cup buttermilk (whisked together 1/4 cup buttermilk powder, 1/2 cup water, and enough fat-free half-and-half to yield 1 cup)
  • 1 teaspoon pure vanilla extract

In medium heatproof bowl, whisk together egg yolks and 6 tablespoons sugar.

In heavy nonreactive saucepan, stir together cream, milk, and remaining 6 tablespoons sugar. Heat over medium-high heat just until barely simmering. Reduce heat to medium. Gently stir 1/2 cup hot cream mixture into egg yolk mixture, whisking constantly; repeat. With heatproof rubber spatula, stir cream in saucepan as you slowly pour egg mixture into pan. Gently cook over medium heat, stirring constantly, 1 to 2 minutes or until mixture is thickened, coats back of spatula, and holds clear path when you run your figures across spatula.

Strain base through fine-mesh strainer into clean container. Set container in ice-water bath; let cool, stirring occasionally. When completely cool, remove from ice-water bath. Cover with plastic wrap; refrigerate 2 hours or up to overnight.

Whisk buttermilk and vanilla into cold base. Freeze in ice cream machine according to manufacturer’s instructions. Enjoy immediately or transfer to chilled container and freeze 4 hours. Makes about 1 quart.