


Departing from regularly scheduled program (which happens to be off the air on Summer Break). Please read. This is important and you might even find it entertaining 🙂
So Dave, then. The reason we’re all here. Whether this is your first visit to The Blog of Funny Names or your 363rd, you owe this corner’s existence to one Mr. King Dave. And today’s post is the fourth in its latest series, dedicated to Dave and his amazing fight.
Fannie, Kerbey and Arto have covered details in earlier posts, so I won’t repeat what they’ve shared. What you need to know is this:
- Dave Carlson is an amazing young man.
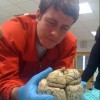
- Among many other entrepreneurial ventures, Dave decided to go to medical school to study neurology.
- Dave works hard and goes far.
- Dave was diagnosed with a brain tumor last November.
- Dave is enduring lots and lots of treatment, much of it successful (yay!).
- Dave insists on returning to med school (part-time) so he can keep on keeping on with his degree.
- Dave has lots of support and is…
View original post 383 more words
